
Raspberry Pi NAS: Install OpenMediaVault + CasaOS (Step-by-Step Guide)
Lets Try
. 3 min read
Is OMV + CasaOS the Ultimate Home Cloud Setup?
In today’s era of data privacy concerns, rising cloud costs, and digital sovereignty, many tech enthusiasts and home users are turning to self-hosted solutions. One promising combination we are installing OpenMediaVault (OMV) with CasaOS On Raspberry Pi5. In this piece, we’ll explore how to setup, what tradeoffs exist, and whether it can truly serve as a “Easy home cloud solution.”

Step-by-Step Guide - Install OpenMediaVault + CasaOS
Step 1 - Install Raspberry Pi OS Lite (64-bit) in your memory card, Create root login and pass too.
Step 2 - Start Your Raspberry Pi
Step 3 - Install OpenMediaVault
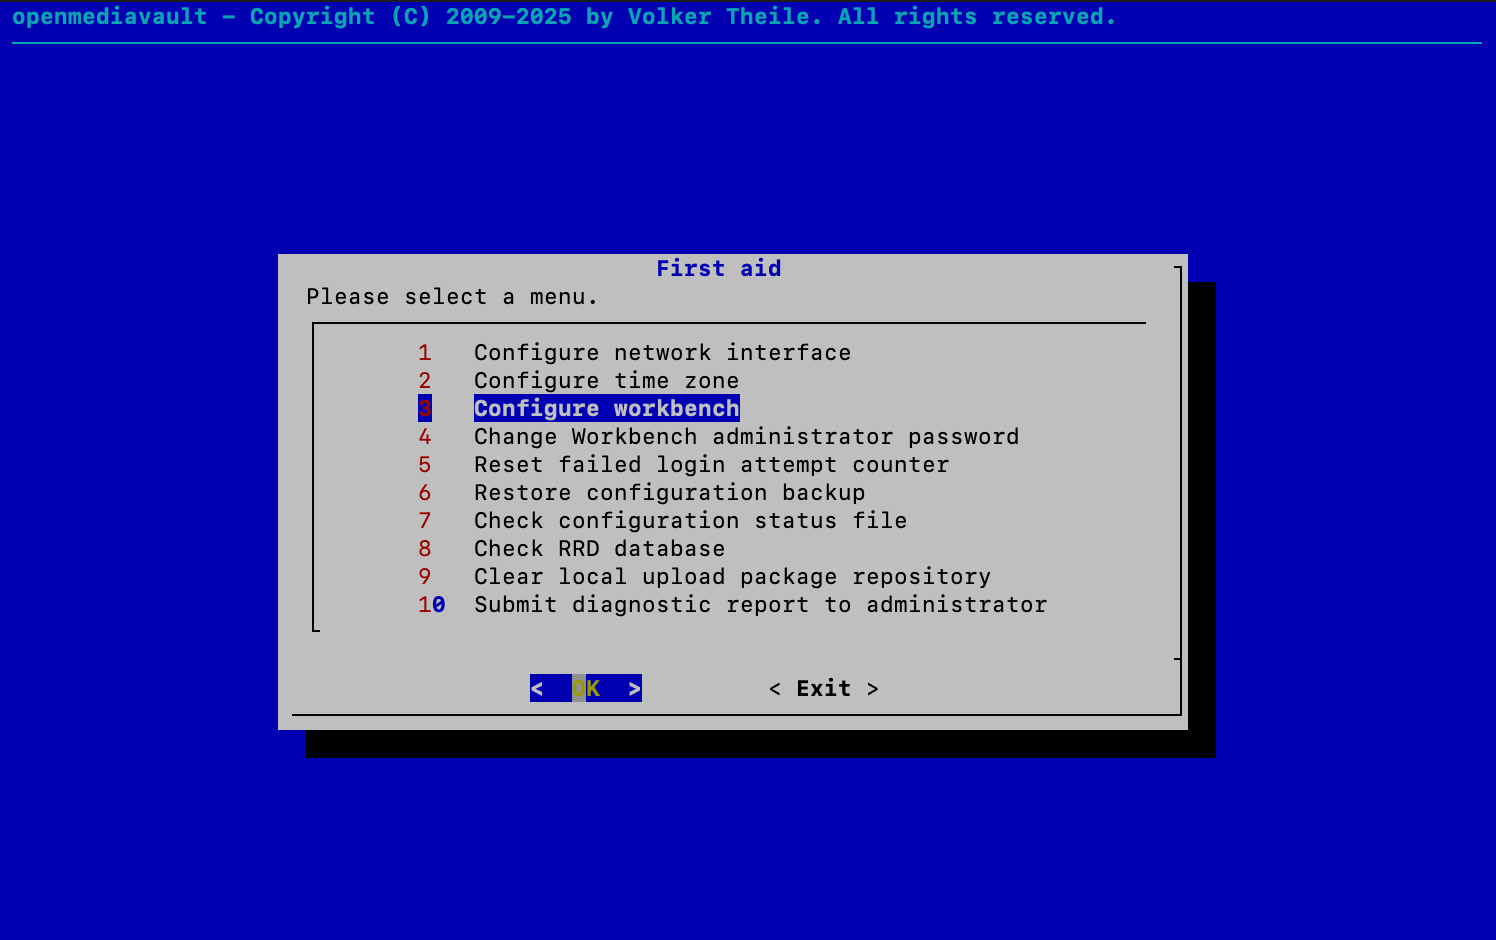
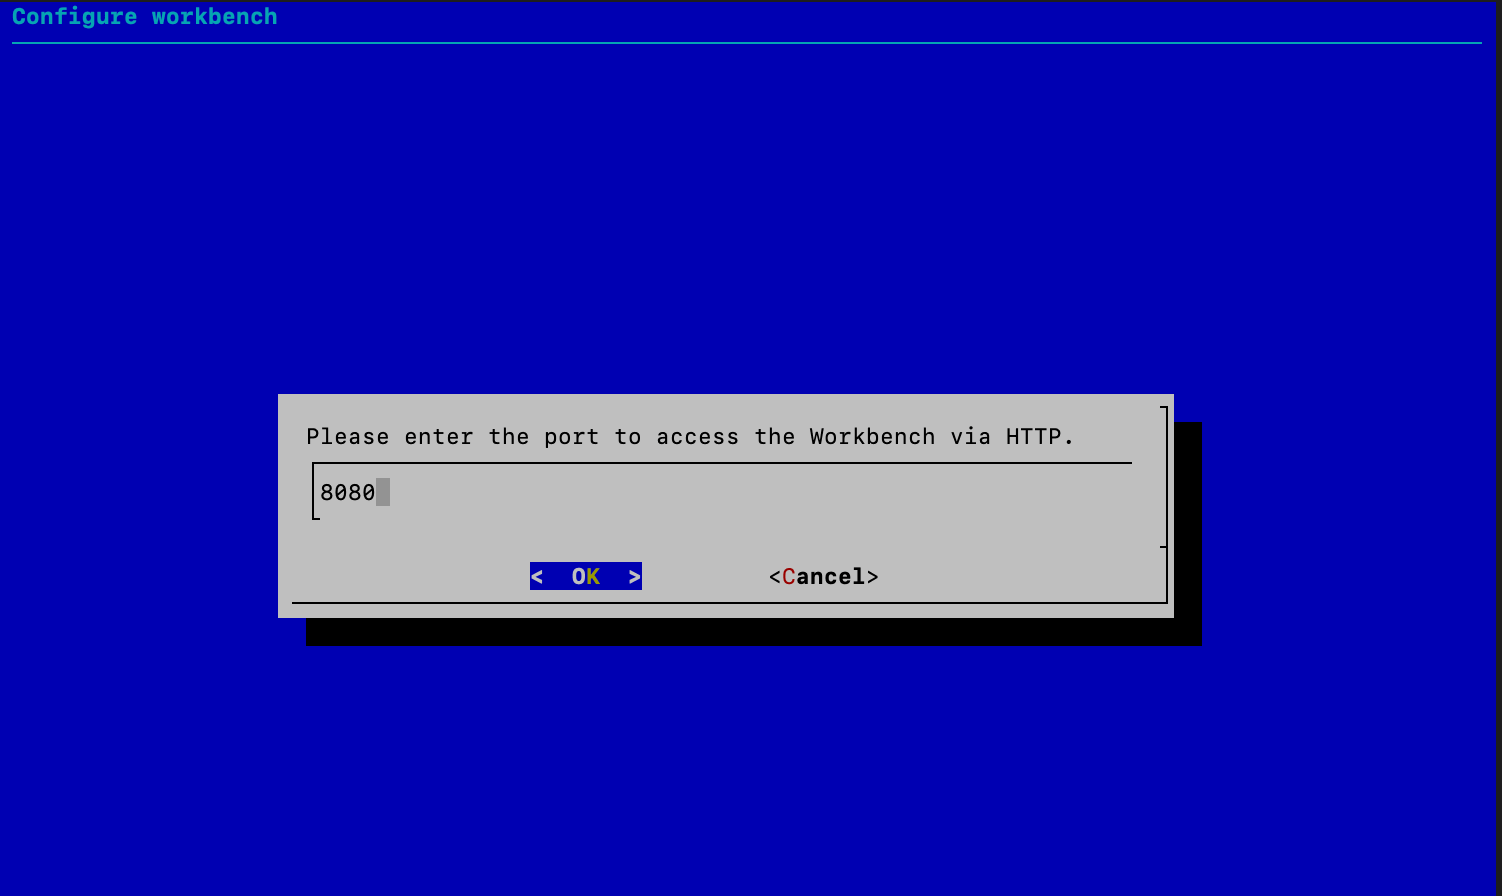
Setup 4 - Change Your OpenMediaVault Port - 80 to 8080
Login to your Raspberry pi using terminal.
OpenMediaVault - First Aid will appear after above command. Select the Option 3 - Configure Workbench
Default Username and Password of OpenMediaVault :
ID : admin
Password: openmediavault
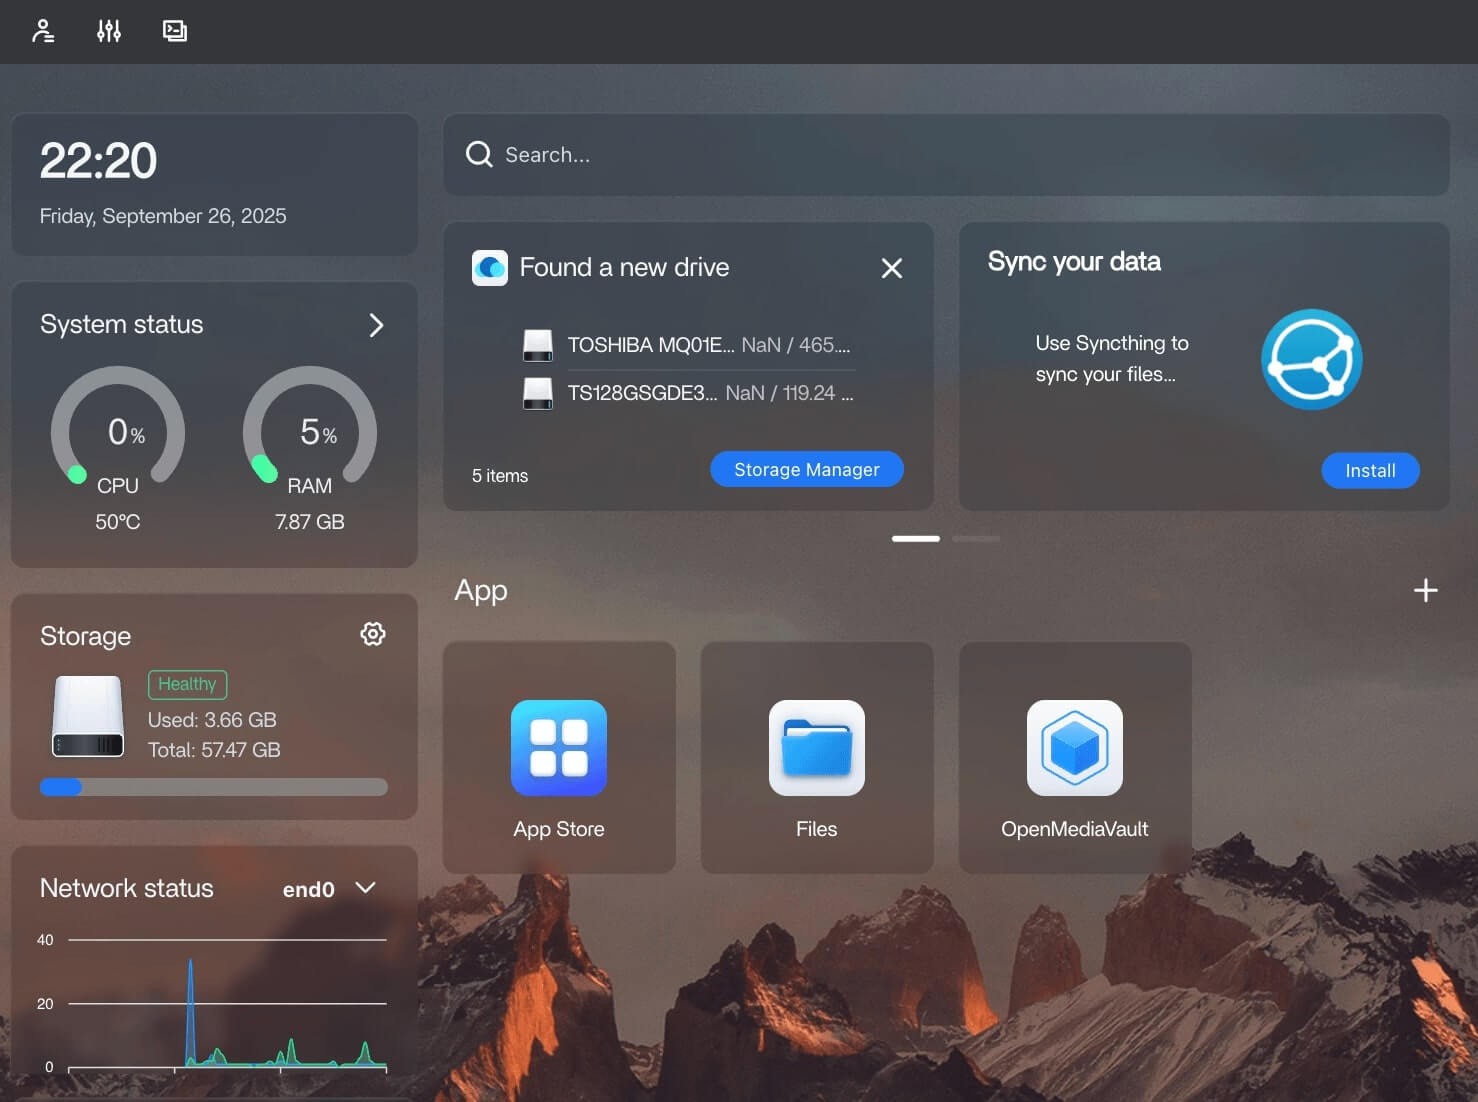
Step 5 - Install CasaOS with 1 command.
Step 6 - Login to your Local IP url ( eg - 192.68.1.55 ) of Raspberry pi and create CasaOS Home Cloud Account.
The Reason Behind Combining Them
The appeal of combining OMV + CasaOS is that you can get the best of both worlds:
Use OMV as a robust foundation: manage storage, disks, RAID, plugins, file services.
Layer CasaOS on top (or alongside) as a friendly interface for running apps, dashboards, and “cloud-like” experiences for non-technical users.
Thus, rather than choosing one or the other, this hybrid approach can target both stability and ease-of-use.
Pros & Cons: What to Expect
Advantages
Flexibility — you can use OMV’s mature features while presenting a friendly interface via CasaOS.
Reduced learning curve — CasaOS can make app deployment simpler for non-expert users.
Self-sovereignty — all data stays under your control, no third-party cloud needed.
Cost savings — once hardware is in place, ongoing costs are mainly power and maintenance.
Challenges & Tradeoffs
Missing features — CasaOS lacks essential features like built-in RAID. You must lean on OMV (or other tools) for redundancy.
Complex setup — combining two systems can introduce integration challenges, version conflicts, or maintenance overhead.
Performance considerations — depending on your hardware, running both systems may tax resources.
Support & stability — CasaOS is newer and may have edge-case bugs, while OMV is more battle-tested.
Use Cases & Recommendations
This setup is particularly suited for:
Home users who want to self-host media servers, file storage, web apps, and dashboards.
Tech enthusiasts who want both control and a nicer interface.
Small offices or labs where budget and data privacy matter.
However, if your primary need is resilient, enterprise-grade storage, or if you’re uncomfortable troubleshooting OS issues, you might prefer a more integrated solution (e.g. TrueNAS, Synology, etc.). But TrueNAS is only work on X86 processor not on Arm.
More Stories from
Deploy Boxcoin SAAS on VPS Ubuntu Nginx Server
Looking for the fastest way to run Boxcoin Crypto SAAS on Ubuntu server? We cover the full installation process on Self-Managed VPS of webdock, hetzner, aws
Set Up Daily MySQL Backups to DigitalOcean Spaces (S3-Compatible)
Step-by-Step Guide to implement Automated MySQL Database Backup to DigitalOcean Spaces or s3 compatible buckets (With Retention & Logs) on Ubuntu server.

Window Server 2025 Contabo VPS Install Guide
Window server in contabo is very costly but you can deploy your license key with custom image.

Setting up SSH keys to a Ubuntu Server with Mac
Generating SSH keys on a Mac for use with an Ubuntu server is a straightforward process. Here’s a step-by-step guide: Generate the SSH Key Pair

Git/Github Clone Private Repository on Ubuntu Server 24.04
GitHub is a free platform that provides repository hosting and We will guide you to install Git on Ubuntu 24.04, adding and cloning a repository from GitHub to your Ubuntu VPS server.


