
Setting up SSH keys to a Ubuntu Server with Mac
Dev
. 1 min read
Generating SSH keys on a Mac for use with an Ubuntu server is a straightforward process. Here’s a step-by-step guide:
Step 1: Open Terminal
On your Mac, open the Terminal application. You can find it in the Applications folder under Utilities, or you can search for it using Spotlight.
Step 2: Generate the SSH Key Pair
Use the ssh-keygen command to generate a new SSH key pair. Run the following command:
ssh-keygen -t rsa -b 4096 -C "[email protected]"
-t rsa: Specifies the type of key to create, which is RSA in this case.
-b 4096: Specifies the number of bits in the key, which is 4096 bits.
-C "[email protected]": Provides a comment, typically your email address.
Step 3: Specify the Key File Location
After running the command, you’ll be prompted to specify a location for the key files. By default, it will save the keys in the ~/.ssh directory:
Enter file in which to save the key (/Users/yourusername/.ssh/id_rsa):
You can press Enter to accept the default location, or you can specify a different path if you prefer.
Step 4: Set a Passphrase
Next, you’ll be prompted to enter a passphrase for your key. This passphrase adds an extra layer of security. Enter a passphrase or press Enter for no passphrase:
Enter passphrase (empty for no passphrase):
Enter same passphrase again:
Step 5: Copy the SSH Key to the Ubuntu Server
You need to copy the public key to your Ubuntu server. The public key file will be named
- Login to Server : ssh [email protected] (your Server IP)
- After login Type command :
cd .. - then Type :
cd /root/.ssh - Edit the file :
nano authorized_keys - Paste your public key which created earlier ( id_rsa.pub ) Your public key will look like this after pasting in
authorized_keys.
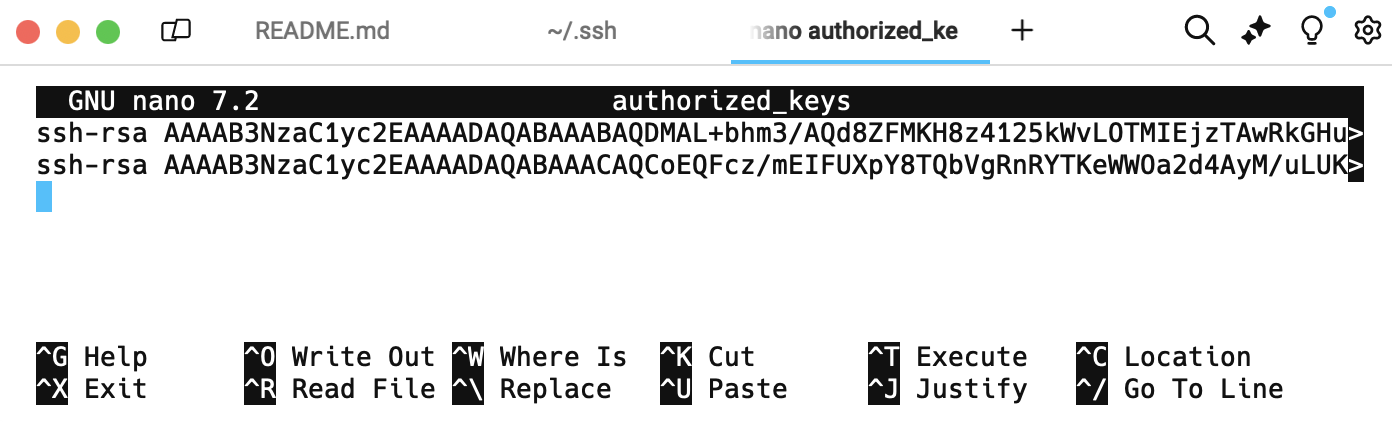
- You can Add multiple Public keys in this file. in above image per public keys shows in per line.
- Save the file Ctrl X and YES
Step 6: Set Permissions on the Ubuntu Server
Ensure that the permissions on your Ubuntu server are set correctly:
ssh username@your_ubuntu_server_ip
chmod 700 ~/.ssh
chmod 600 ~/.ssh/authorized_keys
Step 7: Test the SSH Connection
Finally, test your SSH connection:
ssh -i id_rsa [email protected]
id_rsa: Specifies the name of your private key,
You should be able to connect without being prompted for a password.
By following these steps, you should have successfully generated SSH keys on your Mac and set them up for secure access to your Ubuntu server. If you encounter any issues or need further assistance, feel free to ask!
More Stories from
Window Server 2025 Contabo VPS Install Guide
Window server in contabo is very costly but you can deploy your license key with custom image.

Git/Github Clone Private Repository on Ubuntu Server 24.04
GitHub is a free platform that provides repository hosting and We will guide you to install Git on Ubuntu 24.04, adding and cloning a repository from GitHub to your Ubuntu VPS server.

Deploy Boxcoin SAAS on VPS Ubuntu Nginx Server
Looking for the fastest way to run Boxcoin Crypto SAAS on Ubuntu server? We cover the full installation process on Self-Managed VPS of webdock, hetzner, aws
Set Up Daily MySQL Backups to DigitalOcean Spaces (S3-Compatible)
Step-by-Step Guide to implement Automated MySQL Database Backup to DigitalOcean Spaces or s3 compatible buckets (With Retention & Logs) on Ubuntu server.

Raspberry Pi NAS: Install OpenMediaVault + CasaOS (Step-by-Step Guide)
Turn your Raspberry Pi into a powerful NAS by installing OMV for RAID storage and CasaOS for a simple UI—build a secure, user-friendly home cloud.


