
First web service using eclipse and java
Dev
. min read
Web service is a concept that can be used for exposing the functionality of an application which can be utilized by other application, instead of creating the new functionality.
Let us discuss with a practical example:
Prerequisites:
- Must have basic knowledge of java programming language.
- Must aware about using eclipse id.
- Some basic fundamentals used in the web service, if have then good otherwise will not create any problem.
- Eclipse ide must be installed on user machine and for this example we are using eclipse juno.
- Jdk must be installed on system and for this example we are using jdk1.6.
- Apache tomcat 7 we are using for demonstrating this example.
Let us create a web services in step by step ways:
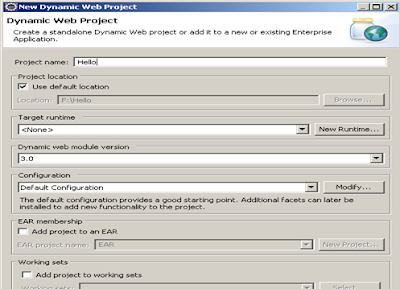
- Step1. Create a dynamic web project Named Hello as shown below:
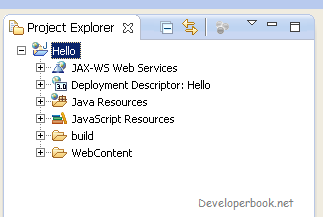
Now workspace will look like given below in Project Explorer:
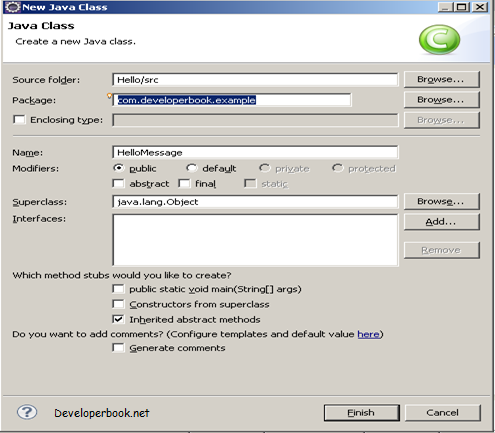
- Step 2. Now create a class named HelloMessage inside the package com.developerbook.example as shown below:
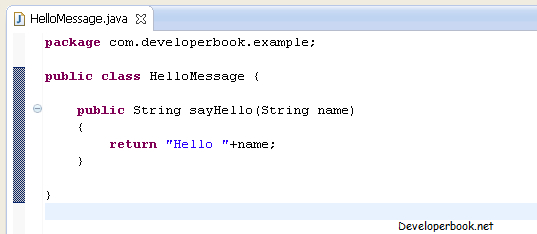
Now add the below code in HelloMessage:
public String sayHello(String name) { return "Hello "+name; }Now code will look like below:
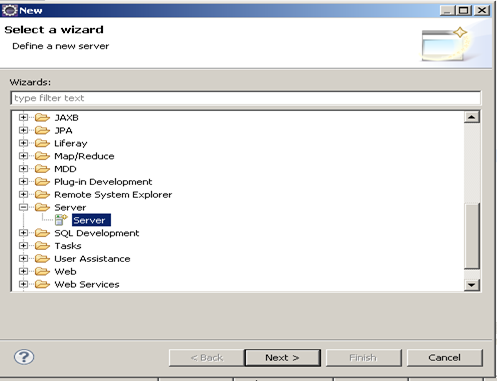
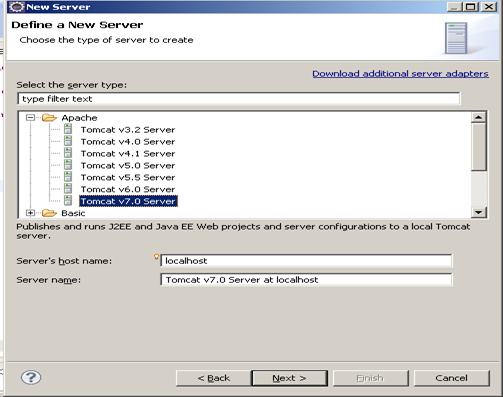
- Step3. Now we need to create server, let’s create it.
Now click next
Now click next
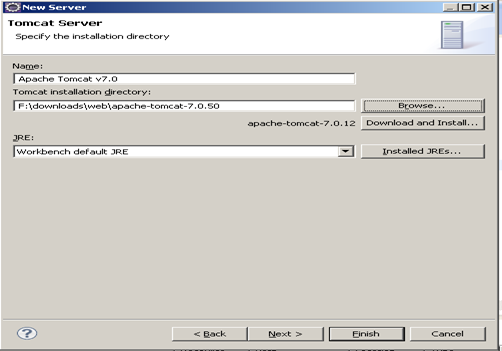
Now click finish.
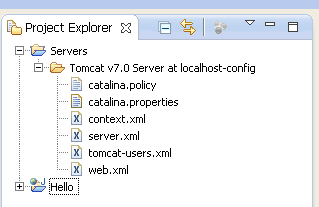
Server will be created like shown above.
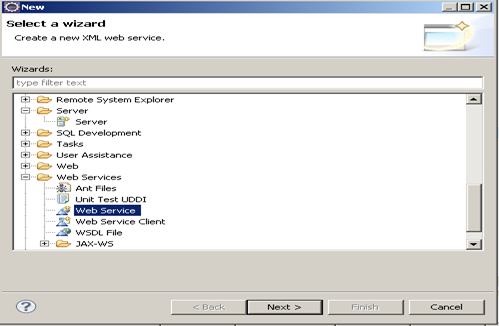
- Step 4: Now we are ready for creating the first web service. Create a new web service by clicking file>New>other then select the Web Service like shown below:
Now add the class HelloMessage created earlier by browsing it. Once selected the HelloMessage class then it will become like given below:
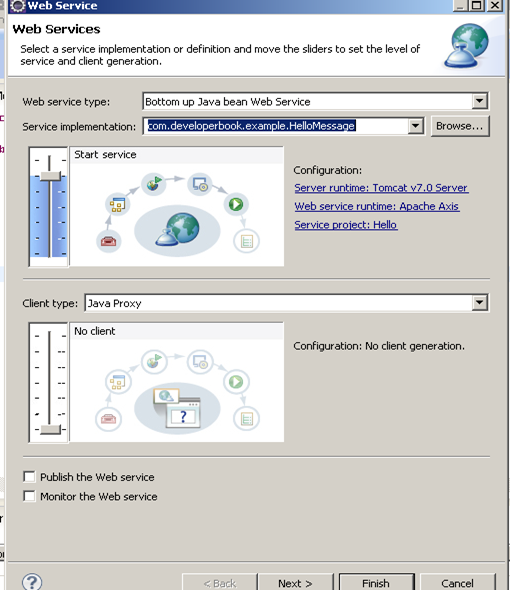
Once clicked on the Finish button then web service will automatically be deployed on server created in earlier step as we added our project in that server.
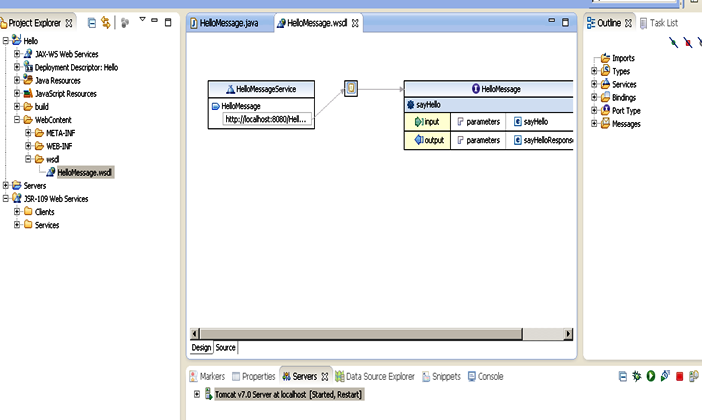
Now check HelloMessage.wsdl folder as highlighted above.
- Step 5. Let’s test the above service created. For doing so right click above highlighted HelloMessage.wsdl file then Web Services>Test with web services Explorer, now the window will be something like mentioned below:
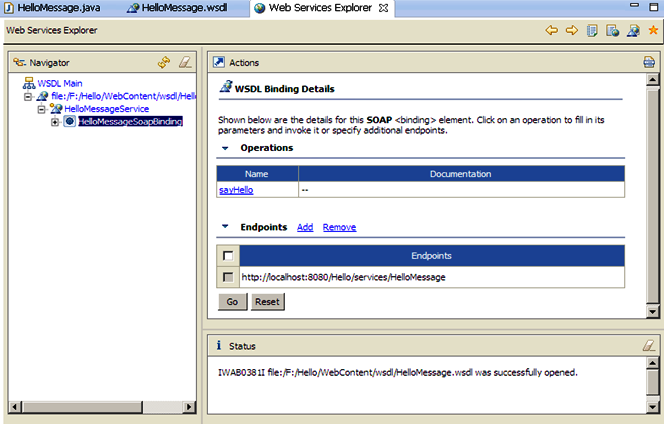
Now expand the HelloMessageSoapBinding and click sayHello as shown below:
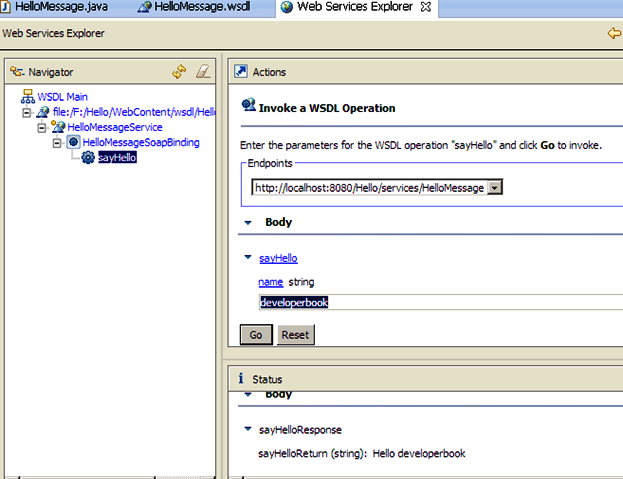
Now enter developerbook in the input field highlighted above in Action window and click go button. Now check Status window for response (here response that we are getting is Hello developerbook) .
If you are able to see then congratulations you successfully created your first web service. If you face any difficulty while creating first web service then you can write your problem in comment section.
Thanks for reading the blog post, your comments and suggestions are always welcome. Soon we will discuss about creating client which will consume the web service and wsdl file also.
More Stories from
Window Server 2025 Contabo VPS Install Guide
Window server in contabo is very costly but you can deploy your license key with custom image.

Setting up SSH keys to a Ubuntu Server with Mac
Generating SSH keys on a Mac for use with an Ubuntu server is a straightforward process. Here’s a step-by-step guide: Generate the SSH Key Pair

Deploy Boxcoin SAAS on VPS Ubuntu Nginx Server
Looking for the fastest way to run Boxcoin Crypto SAAS on Ubuntu server? We cover the full installation process on Self-Managed VPS of webdock, hetzner, aws
Set Up Daily MySQL Backups to DigitalOcean Spaces (S3-Compatible)
Step-by-Step Guide to implement Automated MySQL Database Backup to DigitalOcean Spaces or s3 compatible buckets (With Retention & Logs) on Ubuntu server.

Raspberry Pi NAS: Install OpenMediaVault + CasaOS (Step-by-Step Guide)
Turn your Raspberry Pi into a powerful NAS by installing OMV for RAID storage and CasaOS for a simple UI—build a secure, user-friendly home cloud.


