
Deploy Custom Domain to Wasabi S3 bucket with Cloudflare
Lets Try
. 2 min read
What is Wasabi Hot Cloud Storage?
Wasabi is a cloud storage service that provides object storage services to businesses and individuals. It is similar to other cloud storage services such as Amazon S3, Microsoft Azure Storage, and Google Cloud Storage, but it is known for its low cost and high performance. Wasabi offers a range of storage options including hot storage, which is optimized for frequent access, and cold storage, which is optimized for infrequent access. Wasabi also provides a number of features such as versioning, lifecycle management, and cross-region replication.
.png)
Wasabi is accessed through a web-based console or through APIs and tools such as the AWS command-line interface (CLI) and software development kits (SDKs). It is often used for storing and managing large amounts of data, such as images, videos, and backups.
How to Use Custom Domain ( own sub domain or Main domain) for Wasabi S3 Bucket?
To use your own domain name for a bucket in Wasabi, you will need to create a CNAME record in the DNS configuration for your domain that points to the Wasabi bucket endpoint. Follow the steps below.
- Login to your Wasabi and Cloudflare Account.
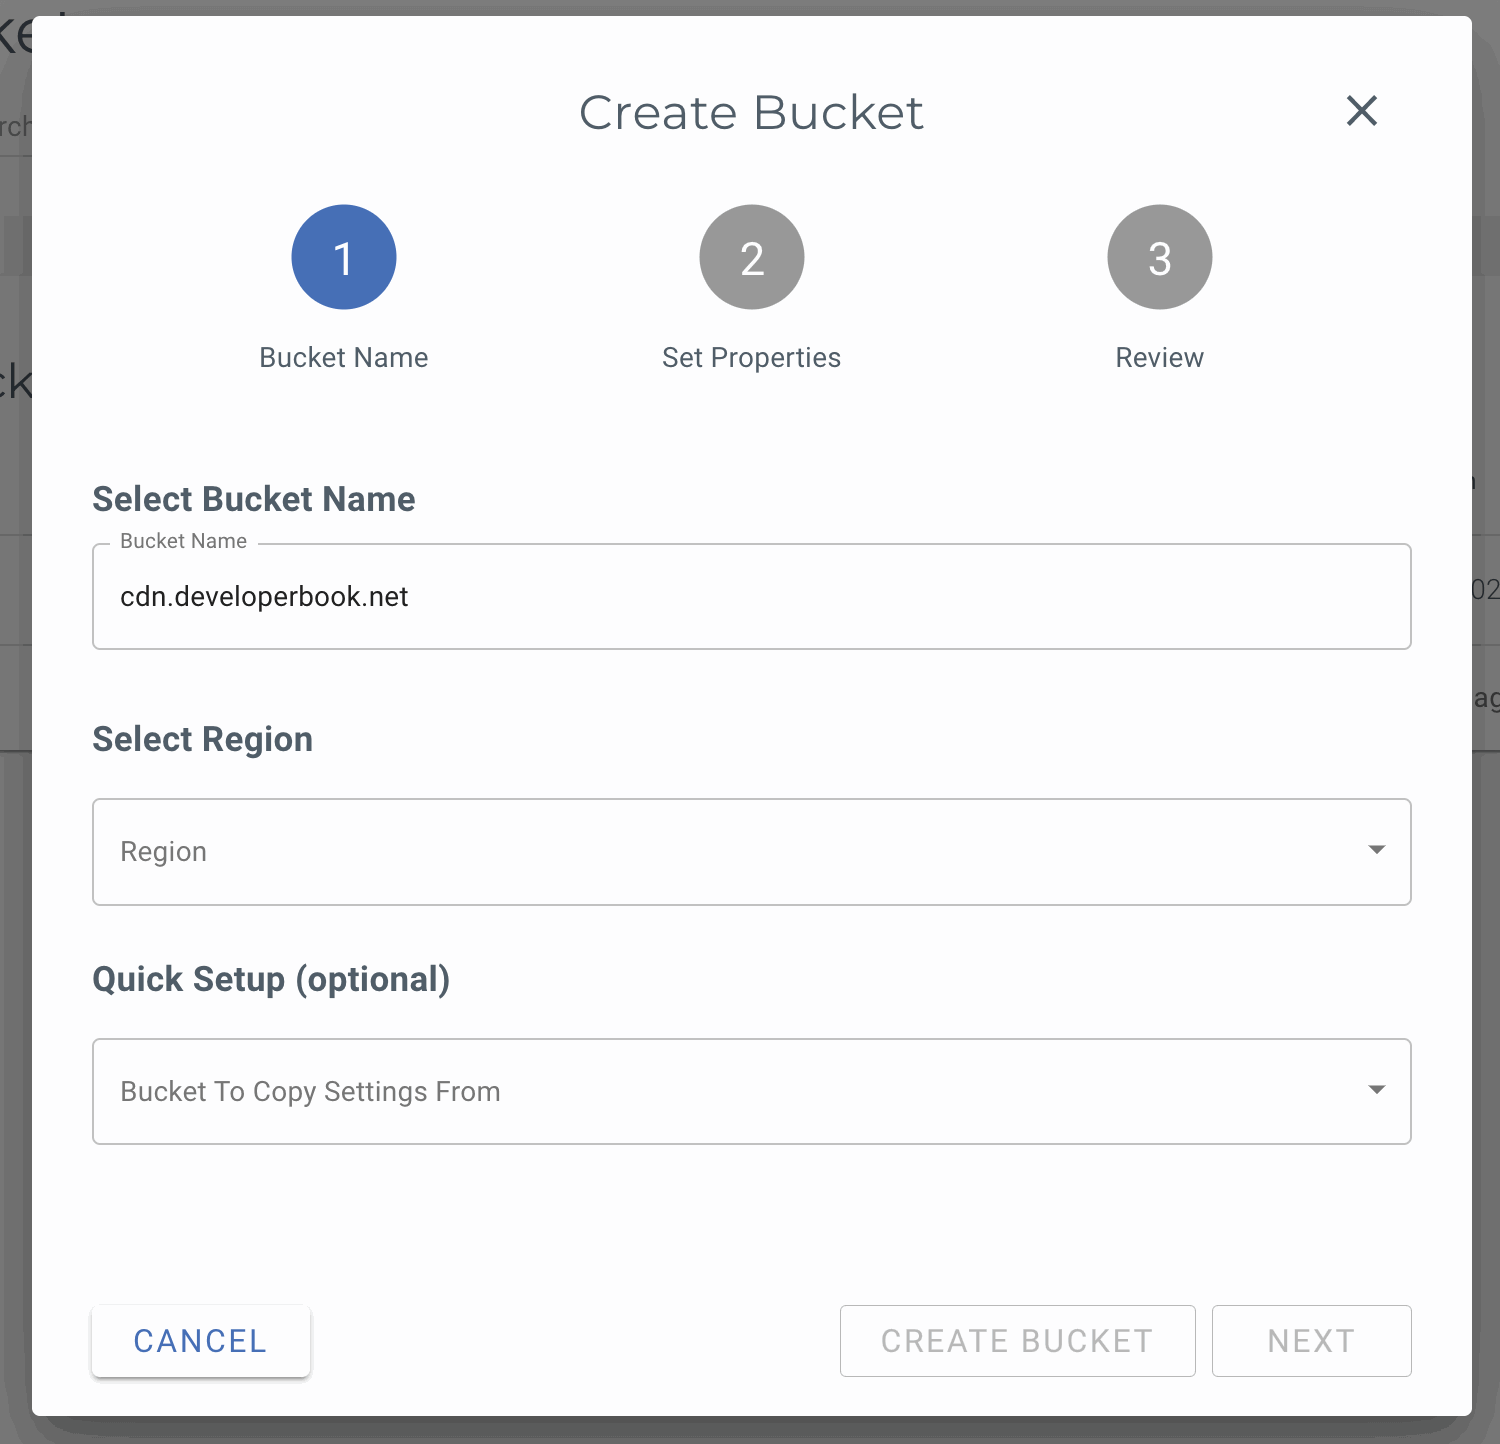
- Create a Bucket ( Bucket Name and Sub Domain Name Should be same ). eg : Bucket Name & sub domain =
cdn.developerbook.net.
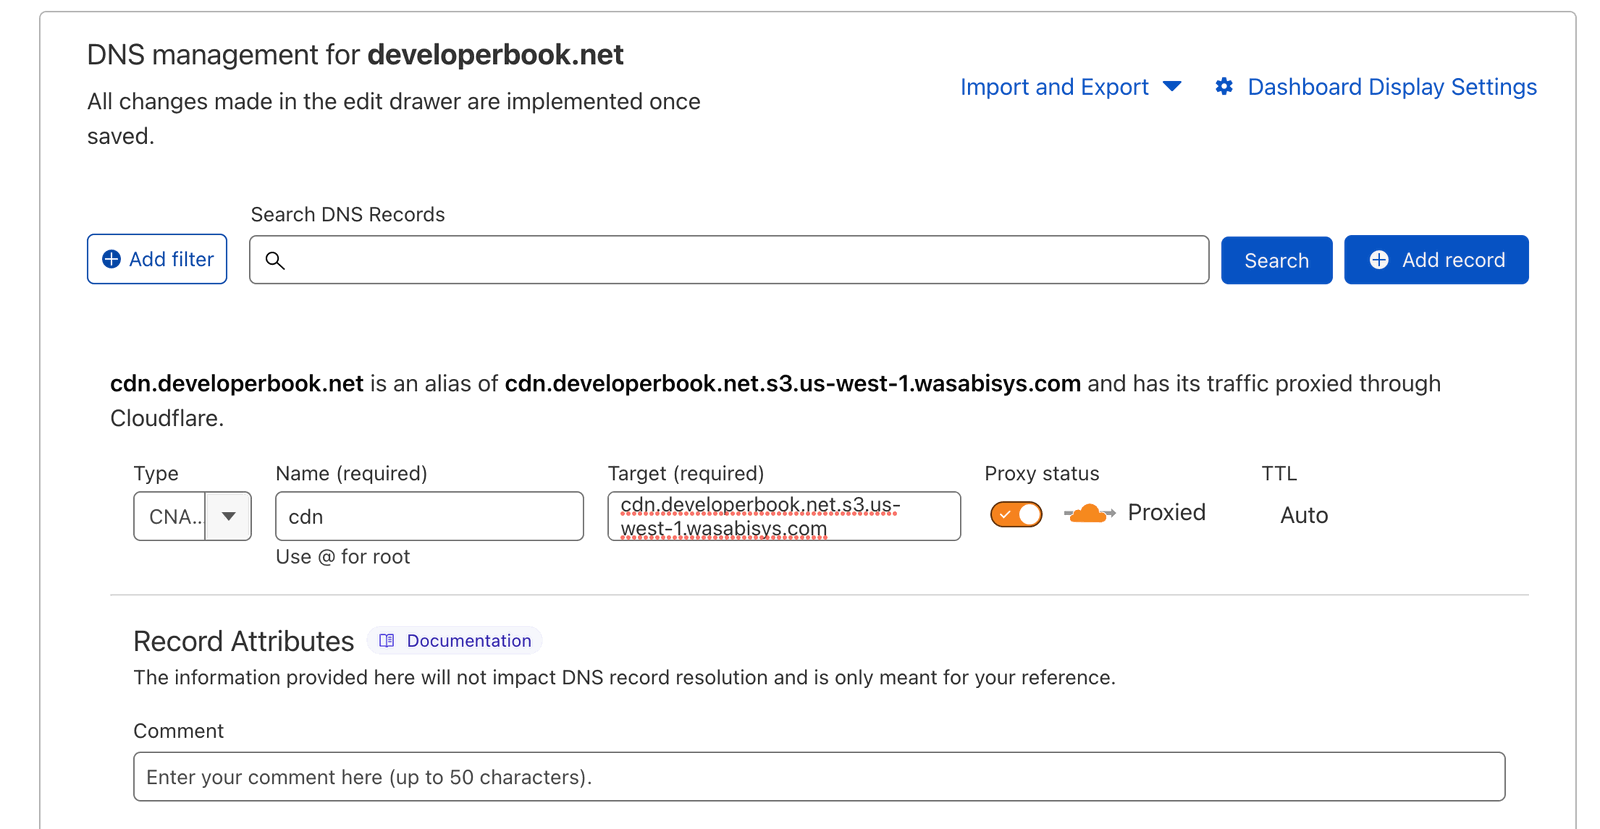
- Add a new CNAME record to the DNS configuration for your domain. The CNAME record should have the following values:
Name: This is the subdomain that you want to use for your Wasabi bucket. For example, if you want to use the domaincdn.developerbook.net, the name would becdn.
Value: This is the endpoint of your Wasabi bucket that you determined in above step.
TTL (Time to Live): This is the length of time that the DNS record will be cached by DNS resolvers. You can typically leave this as the default value (Auto).
- Determine the endpoint of your Wasabi bucket. You can find this information in the Wasabi console or by using the aws s3api list-buckets command in the AWS CLI. The endpoint will be in the format s3.wasabisys.com.
- In the Target field while Adding new CNAME record on the DNS management page of Cloudflare, enter the appropriate address for your Wasabi Hot Cloud Storage bucket's region. For the us-east-1 region, enter
<BUCKET>.s3.wasabisys.com. For all other regions, enter<BUCKET>.s3.<REGION>.wasabisys.com, replacing<REGION>as appropriate (e.g.,<BUCKET>.s3.eu-central-1.wasabisys.com).
- Save the CNAME record and wait for it to propagate. It may take some time for the changes to take effect, as DNS changes can take up to 24-48 hours to fully propagate.
Once the CNAME record has propagated, you should be able to access your Wasabi bucket using the subdomain that you specified in the CNAME record.
Add a Policy
"To make every file in your bucket automatically readable by anyone, you need to create a Bucket Policy."
{
  "Version": "2012-10-17",
  "Statement": [
    {
      "Sid": "PublicReadGetObject",
      "Effect": "Allow",
      "Principal": {
        "AWS": "*"
      },
      "Action": "s3:GetObject",
      "Resource": "arn:aws:s3:::cdn.developerbook.net/*"
    }
  ]
}
The policy looks precisely as the one AWS is using. you can create new here : https://awspolicygen.s3.amazonaws.com/policygen.html
More Stories from
Deploy Boxcoin SAAS on VPS Ubuntu Nginx Server
Looking for the fastest way to run Boxcoin Crypto SAAS on Ubuntu server? We cover the full installation process on Self-Managed VPS of webdock, hetzner, aws
Set Up Daily MySQL Backups to DigitalOcean Spaces (S3-Compatible)
Step-by-Step Guide to implement Automated MySQL Database Backup to DigitalOcean Spaces or s3 compatible buckets (With Retention & Logs) on Ubuntu server.

Raspberry Pi NAS: Install OpenMediaVault + CasaOS (Step-by-Step Guide)
Turn your Raspberry Pi into a powerful NAS by installing OMV for RAID storage and CasaOS for a simple UI—build a secure, user-friendly home cloud.

Window Server 2025 Contabo VPS Install Guide
Window server in contabo is very costly but you can deploy your license key with custom image.

Setting up SSH keys to a Ubuntu Server with Mac
Generating SSH keys on a Mac for use with an Ubuntu server is a straightforward process. Here’s a step-by-step guide: Generate the SSH Key Pair


